
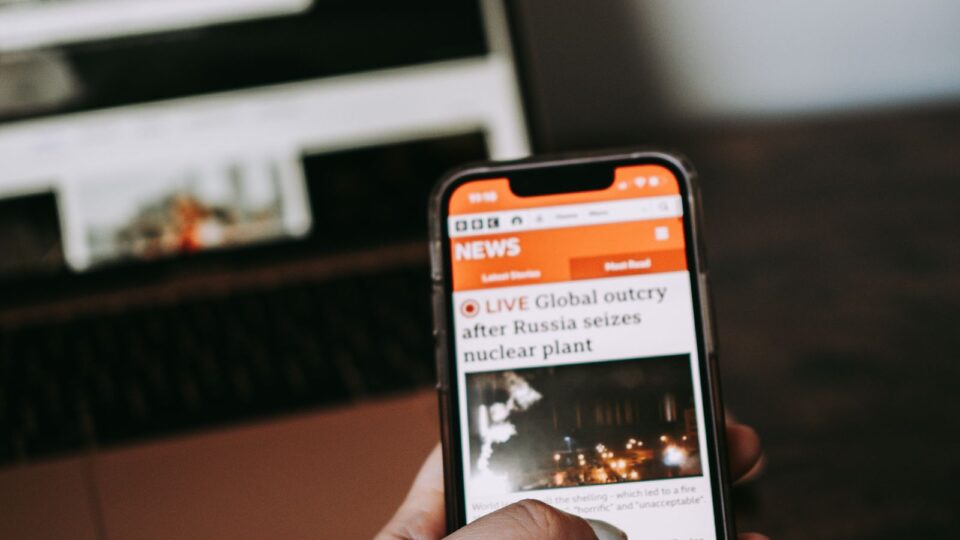
How do you check a fake photo when it looks so realistic that it seems impossible to have been invented? In 2026, the answer can no longer be reduced to “look at the fingers”, “look for a watermark” or “ask an AI detector”. A real photograph can be shared with a false explanation; an image can be cropped to hide its context; and a scene that never happened can be digitally created and presented as breaking news.
A screenshot posted in a family group, a photograph of an alleged flood, protest or accident, accompanied by a message saying “The TV stations are not showing you the truth”, can reach people before anyone has found the original source. A realistic appearance is not evidence of authenticity, and an authentic photograph does not automatically prove the story attached to it. Those two distinctions are the foundation of modern verification.
The scale of the problem is not merely theoretical. In a 2026 Reuters Institute analysis, representatives of the Brazilian fact-checking organisation Aos Fatos said that fast AI-generated material tracked in the context of disinformation had accumulated more than 32 million views on TikTok in 2025. That figure describes a body of material analysed in Brazil, not one photograph or traffic on Romanian platforms. Still, it shows that manipulated images and videos can reach vast audiences.
This InfoBuz guide sets out a nine-step verification method using Google Lens, “About this image”, Google Fact Check Explorer, TinEye, Content Credentials and original-source searches. It includes fictional examples, clearly marked as such, and explains why the absence of evidence should not be replaced with a hasty verdict.
A photograph can mislead in five ways, even if it was not created with AI
When we read “fake image”, we immediately think of a synthetic scene. But journalistic verification involves several different situations, each requiring a different method.
| Type of problem | What happened | Most valuable check |
|---|---|---|
| Old image, new context | A genuine photograph from another year or country is presented as today’s event | Reverse-image search and the earliest verifiable source |
| Edited photograph | An element, person or inscription has been altered or removed | Comparison with the original, multiple frames and the creator’s source |
| Misleading crop | A relevant part of the frame has been excluded | Finding the full photograph and complete sequence |
| Synthetic AI image | The scene was generated wholly or partly digitally | Provenance, the creator’s statement, clues and independent confirmation |
| False description of a real image | The photograph is authentic, but the text assigns an unconfirmed cause or perpetrator | Checking the claim, not just the pixels |
A finding that an image is “authentic” does not mean “the post is true”. For example, a real photograph of a fire does not by itself confirm the location, date, cause, victims or person responsible. Those are separate claims, each requiring separate evidence.
Why emotional images spread before they are checked
A photograph of a child in a flooded area, a collapsed building or a public figure in a shocking situation can prompt an immediate reaction. Messages demanding urgent sharing, claiming information is being hidden, or encouraging outrage turn emotion into pressure to act.
Not every emotional image is false, and nor is a widely shared post automatically manipulative. The problem arises when popularity, shock or trust in the person who sent the photograph is confused with evidence. A post received from a friend may simply have been copied from an unknown source.
For users, the most useful question is: “Who can demonstrate that this photograph shows exactly what the description claims?” If there is no verifiable answer, sharing it quickly is poorly informed.
How to check a fake photograph: the InfoBuz nine-step method
Step 1: Separate the photograph from the attached claim
Write down, in one sentence, exactly what the post claims: “This image was taken today in Constanța”, “The photograph proves that there was an explosion”, or “This person was seen at the event”.
These claims are not identical. One concerns date and place, another an incident, and another a person’s identity and presence. A photograph may partly support one of them without proving the rest.
Look for: source, date, location, author and context. The fact that an image appears in a post with thousands of reactions does not automatically provide any of that information.
Step 2: Identify the earliest publication you can verify
Search the exact text of the post in quotation marks, distinctive keywords and any place names. Check whether the same image appeared in an older article, a photo archive or an official statement.
Do not confuse “the earliest appearance I found” with “the first publication in history”. Search engines index only part of the internet, and pages may have been deleted, blocked or made inaccessible. An indexing date is not always the date the photograph was taken.
Look for: an identifiable author, a documented source, a set of images from the same situation and information that allows independent confirmation.
Step 3: Use Google Lens and “About this image”
Google explains that Lens and, where available, About this image can show where else an image appears online and what context has been attributed to it. They may provide information about indexing history, descriptions from other sources and available metadata.
On a phone, you can save the image or take a screenshot, open the Google app, tap the Lens symbol and select the photograph. Explore the results and, in interfaces that offer it, the “About this image” section. On some Android phones, Circle to Search may allow direct searching from the screen without saving the image.
How to interpret it: if you find the same photograph in a report published two years earlier, the claim that it was “taken today” is contradicted. If no results appear, the image does not automatically become original, recent or authentic.
For more information about the AI Act, see also AI labels become mandatory for content that can mislead the public, which provides complementary details on the subject.
Step 4: Compare results with TinEye and other reverse-image searches
TinEye is a reverse-image search engine specialising in identifying copies and variants of an image. You can upload the file or use its public URL, and sort results by “Oldest” or “Most Changed”.
There is a very important limitation, stated by TinEye itself: “Oldest” is the oldest date on which the engine found the image, not necessarily the day the photograph was taken or first published. It is a lead for finding the source, not a historical certificate.
It is worth comparing results from two tools: each has a different index and may identify different versions of the same photograph. If an image has been heavily cropped, also try searches for distinctive fragments, without uploading sensitive data to third-party services.
Step 5: Check whether the claim has already been investigated
Google Fact Check Explorer makes it possible to search claims checked by specialist organisations and publications. You can use an exact wording, keywords or, where the interface offers the option, image search.
A useful result should be read in full: what claim was checked, what evidence is cited and on what date? A verdict on a similar photograph or an event from another year cannot automatically be applied to a new post.
Important: failing to find a fact check does not prove the claim is true. Some posts circulate before they reach fact-checkers’ radar.
Step 6: Check the place, time and details of the scene
A photograph sometimes contains verifiable elements: street names, signs, road markings, buildings, mountains, vegetation, licence plates, institutional uniforms or weather conditions. A frame said to be from a Romanian city may show an architectural feature or shop sign that can readily be identified elsewhere.
Compare the information with maps, available street imagery, credible geolocated photographs and statements from authorities. For weather events, check official services’ data, taking account of local time and the distance between the weather station and the claimed location.
Do not turn a single visual clue into a verdict. A clear sky in one photograph does not prove that it did not rain anywhere in an entire city that day. Similar buildings may exist in many places.
Step 7: Examine metadata, but do not treat it as a certificate
Some image files retain EXIF data: the device model, technical information, the date reported by the camera or geographical coordinates, if that function was enabled. This data can be useful in verification.
But it may be absent after an image is uploaded to a platform, screenshotted, resized or edited. Some metadata can also be altered. The absence of a “Camera” field does not prove an image was generated by AI; the presence of a camera model does not prove that the photograph depicts a real event.
Protect privacy: do not upload intimate images, documents containing personal data or private photographs of children to public checking services. For such files, prefer local methods or analysis of public sources without sharing the original.
Step 8: Look for Content Credentials / C2PA, and understand their limits
The C2PA standard allows information about a file’s provenance to be attached through cryptographic mechanisms. These Content Credentials can document who signed the provenance data and what creation or editing process is declared.
When available, you can consult tools such as Content Credentials Verify or Adobe’s inspection tools. A valid provenance result can provide valuable evidence about the file, but does not prove that the photographed scene is true. An authentic photograph can be staged or shared with a false description.
Just as importantly, the absence of Content Credentials does not mean a photograph is fake. Metadata may be removed by some editing or distribution workflows, and not all devices and apps use the standard.
Step 9: Seek two independent confirmations and reach a verdict proportionate to the evidence
An image from an official source, a well-documented article and video from another angle may all help reconstruct an event. But two websites reproducing the same anonymous post are not two independent confirmations.
Look for sources that checked the situation separately: the photograph’s author, the responsible institution, original images from another angle or corroborating local information. Check that sources confirm the exact date, place and central claim.
In the end, the verdict may be confirmed, taken out of context, manipulated, digitally generated or unconfirmed on the available evidence. The final category is necessary: not every check should be forced to end with “true” or “false”.
A practical guide for Android, iPhone and laptop
On Android
- Open the photo received in WhatsApp, on a social network or on a website.
- Use Circle to Search if it is available on your device; otherwise take a screenshot or save the image.
- Open Google Lens through the Google app or a compatible photo app and search the image.
- Compare the results with the post’s text and look for the “About this image” section, where available.
- For a specific claim, consult Fact Check Explorer and credible independent sources.
On iPhone
- Save the image or take a screenshot.
- Open the Google app and use Lens to search the image.
- Examine the pages where it appears, the dates and the displayed context.
- Use a browser to access TinEye if you want a second comparison.
- Do not report an event as certain simply because a photograph resembles a search result.
On Windows or Mac
- In Chrome, you can use Google Lens visual search from the image menu or browser bar, depending on the version.
- Open a reverse-image search and compare available versions and sources.
- Use TinEye for matches and altered variants; check the dates found, but do not mistake them for the original date.
- Consult Fact Check Explorer for the claim attached to the photograph.
- If the original file is available and contains no sensitive data, check C2PA provenance or metadata with an appropriate tool.
Menu names can change as apps are updated. The basic method remains the same: find the origin, check the claim and compare independent sources.
Can AI detectors tell you for certain that a photograph is fake?
There is no reason to treat an automated detector score as decisive evidence. In its fact-checking handbook, AFP warns that automated tools intended to identify AI-created images can produce unreliable results. Some authentic photographs can be wrongly labelled synthetic; some generated images can go undetected.
The quality of synthetic images has improved, and classic visual signs — an incorrect number of fingers, impossible shadows or distorted lettering — are no longer necessarily present. At the same time, a real frame that is poorly lit or heavily compressed may contain similar imperfections.
That is why “it has six fingers” can be a clue worth examining, but “the hands look normal” does not prove the photograph is authentic. No visual test resolves every case.
A detector may be used as a secondary clue if you understand its limitations, but the analysis must be supported by provenance, contextual checks and comparisons with real sources. Particularly for allegations involving people or institutions, do not publish a verdict based solely on a percentage given by software.
Three InfoBuz exercises: spotting the problem without becoming a photography expert
The following examples are fictional scenarios created solely for educational purposes. They do not describe real events and are not checks of existing posts.
Scenario A: “Devastating flood in Romania today”
A group receives a dramatic photograph of cars covered by water, with a message claiming it was taken in a Romanian city that morning. A reverse-image search finds the same image on a news website documenting an event in another country four years earlier.
Appropriate conclusion: the image is real, but it is being used in a false temporal and geographical context. It should not be described as an “AI photograph” unless there is evidence it was digitally generated.
Scenario B: “A photograph shows a huge protest”
An image shows a dense crowd, while its description claims participants filled a square to the edges. A full photograph from the same series shows that the viral image was cropped around a crowded part of the square. Even the complete image does not, on its own, establish the exact number of participants.
Appropriate conclusion: the visual context was narrowed through cropping. A quantitative estimate requires additional methods and sources, not one photograph.
Scenario C: “A perfect image proves an unverified accident”
A highly realistic frame shows an alleged accident. The photographer cannot be found, there is no other angle, no original file is available, and authorities do not confirm an incident in the relevant period. An AI detector assigns a high probability that it is synthetic.
Appropriate conclusion: the image and claim are unconfirmed. The detector score is insufficient to declare conclusively that the photograph was generated by AI; the absence of confirmation from authorities must be interpreted in context, especially at the start of an incident.
What changes in the European Union in 2026: labels and markings for AI content
Transparency is also becoming a legal obligation for certain categories of actors. The European Commission states that the transparency obligations in Article 50 of the AI Act apply from 2 August 2026. Depending on the role and specific situation, they concern machine-detectable marking of AI-generated or manipulated content and disclosure of certain deepfakes.
There are, however, distinctions between providers of AI systems and those who use them professionally to publish material, as well as specific exemptions and conditions for artistic or satirical works and certain activities. For systems placed on the market before 2 August 2026, there is a limited transition period for certain marking obligations, until 2 December 2026.
The new legislation does not mean that every synthetic photograph will immediately display a visible sign, that every platform will retain it, or that an unlabelled image is authentic. It is a step towards more transparent provenance, not a perfect solution to disinformation.
InfoBuz has separately examined why an AI label alone does not prove a video is fake and what the European rules change. This guide focuses on practical verification of photographs and the explanations accompanying them.
Content Credentials are not “cryptographic truth”: what they confirm and what they do not
C2PA can record and sign information about a file’s history, but the standard’s official documentation makes clear that provenance data alone cannot establish whether the depicted scene is factually accurate.
A photograph can be produced by a real camera, correctly signed, and still illustrate a staged event. Conversely, an AI-created image can be transparently labelled and legitimately used as an illustration in an article explaining a concept. The problem arises when audiences are misled about the nature or meaning of the visual.
In practice, provenance is one piece of a larger puzzle: signatures show the documented history of a file, independent sources support or challenge claims, and contextual analysis helps identify misinterpretations.
Why a screenshot can destroy the evidence you need
A photograph received through a messaging app may be compressed, resized or turned into a screenshot. These operations can remove useful file data and alter details that would have allowed comparison with the original.
If you are investigating a possible fake, it is preferable, where possible and safe, to retain the link to the original source, the date and the post’s text, not just the cropped image. A screenshot shows how you saw the post at a particular moment, but does not always document information about the photographer.
For material with the potential to cause harm, make sure documentation does not lead to the unnecessary republication of personal data, children’s identities or sensitive content.
How to respond in a family group when someone shares a suspicious photograph
A useful correction does not need to be aggressive. Rather than accusing someone of spreading “lies”, you could say: “I searched for the photograph and found it in an older article. I think it is worth checking the location and date before we share it.”
If you have not found the source, the accurate wording is: “I was unable to confirm the photograph through independent sources”, not “it is definitely fabricated”. The distinction matters for trust, and to avoid replacing unverified information with another unsupported claim.
If the image is linked to a request for money, a message about a relative in danger or an alleged institution, do not use the photograph as confirmation of identity. Verify through a known channel of communication and, if bank details are involved, see InfoBuz’s article on the first steps after online fraud.
What newsrooms and page administrators should do before publishing a viral photograph
A simple editorial rule can prevent costly mistakes: do not publish an image just because it is popular. Document the source, confirm the right to use it, check the context and record what is known with certainty. UNESCO recommends verifying user-generated content and explaining the verification method before publication, prioritising accuracy over speed.
In a newsroom, a minimal record for every photograph with public significance would be useful: the initial source URL, the date it was found, the author or rights holder, the claim being checked, reverse-search results, independent confirmations and any limits of the investigation.
Illustrative or AI-generated photographs should be described as such and should not be used to suggest that a real incident has been visually documented if it has not been confirmed. For reporting on victims, crimes, health or identifiable individuals, the verification threshold should be higher.
A transparent editorial policy also avoids the opposite error: automatically labelling a photograph “fake” simply because an AI detector is unreliable. Until sufficiently strong evidence emerges, choosing not to publish is sometimes the most responsible option.
Checklist: ten questions to ask before sharing
- Do I know who took the photograph or who first published it?
- Is there a verifiable date and locality, rather than only an emotional description?
- Have I searched for the image with Google Lens or another reverse-image engine?
- Have I checked whether the same photograph circulated before the claimed event?
- Have I compared a larger version or the uncropped frame, if one exists?
- Have I separately checked the main claim in the description?
- Are there independent confirmations, rather than just sites copying the same message?
- Do I understand the limits of metadata, AI labels and detectors?
- Could resharing the photograph expose private individuals, victims or children?
- If the information remains uncertain, can I wait until evidence emerges?
Frequently asked questions about fake photographs and AI images
How do you check a fake photograph with Google?
Open the image in Google Lens, review the results and check “About this image” where it is available. Look for older publications and compare descriptions. The results are clues, not an automatic verdict.
Can Google Lens reliably detect AI-generated photographs?
No. Lens can help identify context, similar images and some provenance information, but it cannot guarantee that every unmarked image is authentic.
What is reverse-image search?
It is a search starting with a photo file or image rather than words. It can identify copies, older publications and altered versions of a frame.
What are the most useful free tools for verifying images?
Google Lens, Google Fact Check Explorer and TinEye are useful tools with different functions. Content Credentials Verify tools can also be consulted for files that use C2PA.
Does the absence of EXIF metadata mean a photograph was made with AI?
No. Metadata can be lost through compression, resharing, screenshots or export, including from authentic photographs.
Is an image with valid Content Credentials necessarily true?
No. They provide signed information about provenance; they do not independently confirm the truth of the story or scene.
Can I trust a detector showing “99% AI”?
Such a result should not be treated as definitive proof. Automated tools can make mistakes; checks of origin and context are necessary.
Are photographs with normal hands and shadows automatically real?
No. AI models can produce images without obvious errors, while real photographs can contain compression artefacts or reflections that are difficult to interpret.
What should I do if I cannot find the original source?
You can record that the image is unconfirmed and avoid sharing it as evidence of an event. The absence of a source does not by itself prove that the image is false.
Does the AI Act require all AI images to display a visible label?
Not in those absolute terms. Article 50 imposes obligations on certain providers and users, with distinct rules for technical markings and deepfake disclosure, as well as exemptions and transition periods.
Conclusion: in 2026, it is no longer enough to ask, “Does it look real?”
The era of visual disinformation does not mean every image online is fake. It means that a photographic appearance alone is no longer evidence. A photograph may be generated, edited, cropped or presented in an entirely different context. Each type of problem must be checked differently.
The best tool is not a detector promising a spectacular percentage, but a process: identify the claim, find the source, reverse-search the image, compare the evidence, examine provenance and do not claim more than you have demonstrated.
And perhaps the most important rule is this: a photograph can be authentic while the story attached to it is false. If you cannot confirm what it shows, explaining the uncertainty is more useful than helping it spread.
Sources and methodology
- Reuters Institute (2026) – AI and the Future of News; data presented by Aos Fatos on the spread of AI content.
- Google – About this image, Google Lens and Circle to Search.
- Google News Initiative – Fact Check Explorer and searches for checked claims.
- TinEye – limits of reverse-image search and the meaning of sorting by oldest indexing.
- AFP Fact Check – methodology and the limits of automated AI-content identification tools.
- AFP Fact Check – how original sources and visual context are checked.
- C2PA – frequently asked questions about Content Credentials.
- C2PA – technical explanation of provenance and the limits of fact-checking.
- European Commission – Article 50 AI Act transparency obligations.
- UNESCO – the importance of media and information literacy in the context of AI images and disinformation.







Discuția cititorilor
Ai o opinie sau o întrebare despre acest articol? Spune-ne ce crezi.
Fii primul care deschide discuția.
Te rugăm să păstrezi un limbaj civilizat și să discuți la subiect. Comentariile spam sunt filtrate automat.