
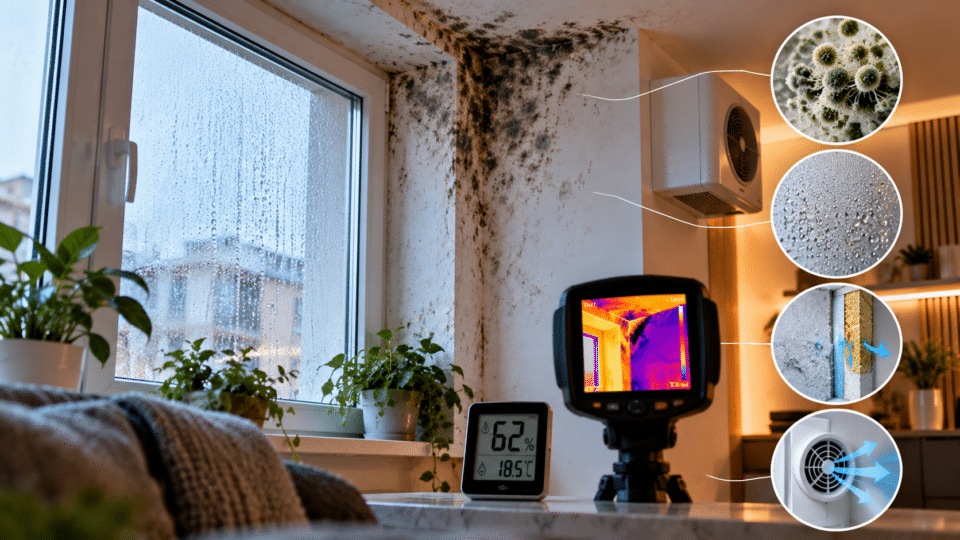
Mold in a new home, with freshly painted walls, high-performance windows and thick insulation? It may seem like a paradox. The owner has paid for comfort, lower bills and an efficient home, yet notices grey patches in a bedroom corner, droplets on the windows or a damp smell behind furniture. The first impulse is often to buy an anti-mold product and repaint. But the patch may return within a few weeks if the source of the water remains unidentified.
A new house may retain moisture in screeds and plaster, have inadequately sized ventilation, a thermal bridge near a window, a leak in the terrace waterproofing, a leaking pipe, or several of these problems at once. Thermal insulation is not a guarantee against damp: it works properly only as part of a correctly designed and executed system, with vapour control, drainage, sealing and adequate air exchange.
This guide differs from the usual advice on “getting rid of mold”. It explains how to separate the cause from the symptom in a recently built home: what the position of a patch may indicate, how to interpret relative humidity and dew point, why thermal imaging is not a diagnosis on its own, what to check at handover and when to call a specialist. It includes an indicative diagnostic table and a practical seven-day log.
InfoBuz editorial research: 22 October 2026. Main references: the World Health Organization, US EPA, CDC, Umweltbundesamt (Germany), ASHRAE and the UK guidance on damp and mold updated in 2026. Recommendations from foreign institutions are presented as technical or health benchmarks, not as legal obligations automatically applicable in Romania.
Mold in a new home: the short answer before repairing the wall
The first step is to identify where the water is coming from. If patches appear in corners and near windows during the cold season, condensation and cold surfaces are plausible explanations. If they worsen after rain, inspect the façade, roof and seals. If a patch remains damp regardless of the season or appears near plumbing, a possible leak must be investigated. In a recent build, residual moisture in materials may also contribute.
The WHO and the EPA recommend preventing persistent moisture and addressing its cause before considering the problem resolved. You do not need to identify the mold species to understand that a damp surface needs attention.
For a sound diagnosis, consider the location, timing, progression, local temperature and any possible paths taken by water. A hygrometer can be useful, but it does not measure moisture inside a wall. A thermal camera shows temperature differences; it does not automatically confirm an infiltration.
1. Why can an energy-efficient building still develop mold?
Modern homes are designed to limit heat loss through walls, roofs and windows. This is a sound objective: a well-insulated building envelope reduces cold surfaces and, under suitable conditions, can lower the risk of condensation. Problems arise when high airtightness is not accompanied by sufficient ventilation and correct construction details.
In an older home, air sometimes entered uncontrollably around windows and through gaps. Replacing these with airtight windows may reduce energy losses, but it also reduces incidental air exchange. A new house designed to be highly airtight has an even greater need for a clear strategy for removing moisture from kitchens, bathrooms and bedrooms. This does not mean leaky gaps are desirable; it means fresh air must be supplied in a controlled way.
Germany’s environmental agency, Umweltbundesamt, explicitly notes that mold problems can arise in both older buildings and energy-efficient new construction. UK guidance updated on 1 April 2026 says insulation and airtightness measures should be coordinated with ventilation to avoid unintended consequences.
This article considers new construction. InfoBuz’s article on mold appearing after replacement double-glazed windows are installed or an existing apartment block is renovated examines renovation-specific problems in detail.
2. Invisible water: why the dew point matters more than a simple patch
Room air contains water vapour. Relative humidity tells us how close the air is to saturation at its current temperature. When that same air comes into contact with a colder surface, local relative humidity can rise. At the dew point, liquid condensation forms.
Consider a calculated example, rather than a measurement from an actual flat: at 21°C and 60% relative humidity, the dew point is about 12.9°C. If part of a wall is at 15°C, droplets are not necessarily visible. Yet, under the simplified conditions of this example, relative humidity in the layer of air next to the surface may reach around 87%. That is well above the 60% shown by a hygrometer in the middle of the room.
| Hypothetical example at 21°C indoors | At 50% humidity | At 60% humidity |
|---|---|---|
| Approximate dew point | 10.2°C | 12.9°C |
| Estimated relative humidity next to a wall at 15°C | About 73% | About 87% |
| Interpretation | Cold surface, but below the 80% benchmark in this example | Potentially favourable conditions for mold growth if they persist |
Indicative thermodynamic calculations using the Magnus relation for saturation pressure; they assume the same vapour content in the air reaching the wall, with no other flows or sources. They are not a diagnosis, and the result depends on exposure time, material and actual temperature.
ASHRAE warns that the risk of mold growth rises when humidity at the material surface remains high for a long period, using a benchmark of about 80% in certain assessments. Crucially, 80% at the surface does not mean 80% on a room hygrometer. Mold can appear without obvious droplets on the wall.
3. Hidden cause No. 1: thermal bridges at beams, corners and windows
A thermal bridge is an area where heat is lost more readily than through neighbouring elements because of geometry, materials or discontinuities in the insulation. Typical examples include the edge where two external walls meet, the junction between a slab and façade, a concrete column, lintel, balcony or window perimeter.
A façade may have 15 centimetres of insulation while a poorly executed detail remains next to a beam or window frame. At that point, the interior surface temperature drops and local humidity rises. Mold may sometimes appear as a narrow line along a corner or a band around a window.
A particular issue can occur behind wardrobes placed very close to external walls. Air circulates less freely and less heat from the room reaches the concealed surface. The German mold guidance explains why furniture and curtains can encourage cold, damp areas.
What to check: photograph the exact path of the patch; see whether it returns in the same place when it is cold outside; check for nearby concrete or metal details; and, where the issue persists, seek an assessment from a building-physics specialist. Thermal imaging under suitable conditions can help locate a bridge, but should not be interpreted in isolation.
A window construction detail can change the outcome. InfoBuz has a separate guide on choosing efficient windows and installation that avoids sealing mistakes.
4. Cause No. 2: the home is airtight, but damp air has nowhere to go
Cooking, showering, drying clothes, breathing and other everyday activities add water vapour to the air. These activities are normal and are not, in themselves, a resident’s mistake. If damp air is not removed effectively, humidity can build up.
In a new flat with very airtight windows, a bathroom without a working extractor fan or a kitchen with a cooker hood that recirculates air rather than exhausting vapour outdoors may face a higher risk of moisture accumulation. A hood with filters can retain some particles and odours, but it is not equivalent to exhausting moisture outside.
In a house with mechanical ventilation with heat recovery, problems may lie in design, air-flow balancing, clogged filters, a blocked intake or incorrect use. Do not turn the system off to save money without understanding the effect on air exchange. See InfoBuz’s guide to heat-recovery ventilation and common mistakes in new homes.
What to check: do extractor fans work? Is air actually exhausted outdoors? Is there a fresh-air intake? Does humidity rise sharply after a shower and remain high for hours? If equipment is not working or airflows are inadequate, it should be checked by a competent company; opening a window for a few minutes and declaring the problem solved is not enough.
5. Cause No. 3: construction moisture in screed, concrete and plaster
A new building contains water used in construction processes: in concrete, mortars, plasters, adhesives and screeds. Some of this moisture must be released as materials dry and cure. Moving immediately into a closed, insufficiently ventilated home may allow residual moisture to add to the indoor moisture load.
There is no single number of days after which every screed or concrete element is “perfectly dry”. The time required depends on the material, thickness, chosen technology, temperature, ventilation and the manufacturer’s recommendations. A finish installed before specified conditions are met can therefore encourage moisture accumulation and hidden deterioration.
This problem should not automatically be confused with rainwater infiltration. Construction moisture is linked to the building process; infiltration requires a path by which water continues to enter. The two can coexist. A competent assessment may include measuring moisture in materials with methods and devices appropriate to the substrate, rather than simply reading a hygrometer.
What to check: the dates screeds and finishes were laid, product data sheets, moisture measurements before flooring was installed, the drying programme, and the heating and ventilation history. If you notice swelling parquet, delaminating finishes or a persistent smell from the floor, do not conceal the issue under another decorative layer.
6. Cause No. 4: infiltration through a terrace, façade, roof or window perimeter
A patch that intensifies after rain raises suspicion of water entering from outside. In new buildings, vulnerable points may include terrace waterproofing joints, service penetrations, balconies, window sills, gutters, façade joints and window-frame connections.
A useful clue: a linear mark beginning at the ceiling or a patch located next to a junction may point to a different mechanism from small recurring spots that emerge in wall corners in winter. But the shape of a patch is not sufficient evidence. Water can travel through a structure and become visible away from the point where it entered.
UK technical guidance from 2026 recommends checking gutters, downpipes, roofs, joints and window seals when investigating damp. These are useful technical criteria in Romania as well, without turning UK legal rules into local legislation.
What to check: photographs after rain, wind direction, safely made exterior observations and any recent roof or terrace work. Do not climb onto a roof without protection or puncture waterproofing for an improvised inspection; call competent professionals.
7. Cause No. 5: plumbing leaks or condensation from equipment
A wall that appears dry at the surface may be damp inside because of a pipe, water-supply connection, drain or air-conditioning system with defective drainage. In modern homes, service routes may be concealed in walls, floors or technical recesses, so the problem may not be immediately visible.
Possible signs include a patch near a bathroom or kitchen, progression unrelated to the weather, a persistent smell in a recess, an unexplained increase in water use or moisture beneath an air-conditioning unit. None of these alone proves the location of a leak.
Leaks must be stopped and investigated before finishes are reinstated. The EPA recommends drying materials quickly after a water incident, ideally within the first 24–48 hours where possible, to reduce the risk of mold growth.
If pipes in common areas or neighbouring flats are involved, keep a written timeline and contact the building manager or relevant maintenance company. Work on concealed installations should be carried out by qualified people.
8. Cause No. 6: furniture pressed against external walls and areas without air circulation
A large wardrobe, bookcase or bed headboard can reduce air circulation immediately next to an external wall. Even if the middle of the room is comfortably warm, the wall behind the furniture may be colder. With the same amount of water vapour, relative humidity near that surface rises.
The phenomenon is also recognised in German technical literature on thermal bridges and air circulation in building corners. This does not mean every piece of furniture must be moved away from every wall, but a cold, concealed area is worth checking.
What to check: the smell behind the wardrobe, the temperature and condition of the surface, moisture at the skirting board and any difference from the rest of the room. Move furniture safely, without scraping or spreading visible mold, and seek help if the affected area is large.
A practical gap from an external wall can help air circulate, but there is no universal number of centimetres that will remedy a thermal bridge or infiltration. If a wall is cold because of a construction defect, simply moving the wardrobe does not remove the cause.
9. Cause No. 7: water from the ground, plinth or spaces beneath the floor
In a new house in direct contact with the ground, moisture can also result from problems with drainage, foundation waterproofing, the connection between the plinth and wall, or the floor. Not every patch at the foot of a wall is “rising damp”; diagnosis is more complex, and in some buildings this explanation is invoked too quickly.
Observe whether damp appears after heavy rain, in areas bordering the ground, near terraces or in a basement. Without digging next to the foundation, visually check whether surface water is directed towards the house or away from it. Waterproofing and drainage problems require specialist inspections and solutions.
For a new plinth or foundation, consult the documentation for the work carried out. InfoBuz has a technical article on insulation and waterproofing beneath a house slab, which is useful for understanding the different layers but is not sufficient to diagnose an infiltration without an inspection.
10. Diagnostic table: what the location of mold may suggest
| Where the problem appears | Causes worth investigating | What to observe before intervening |
|---|---|---|
| External corner, especially in winter | Thermal bridge, poor air circulation, high humidity | Wall temperature, season, progression after airing and heating |
| Around a window | Condensation on cold surfaces, installation detail, possible infiltration | Water marks on glass, sill and frame; relationship to rain or cold |
| Ceiling, near a terrace or roof | Defective waterproofing, leaks, sometimes condensation | Appearance after precipitation, path of moisture, roof inspection |
| Behind a wardrobe | Cold wall and lack of air circulation; possible infiltration | Temperature, smell, moisture, continuity of the patch |
| Bathroom or kitchen area | Insufficient ventilation or a plumbing leak | Extractor operation, connections, persistently damp areas |
| At skirting board, parquet or plinth | Construction moisture, leak, drainage or waterproofing | Work history, substrate measurement, rain and plumbing |
This is an editorial orientation tool, not a certified diagnostic method. Several causes can overlap, and assessing a photograph is not enough to establish responsibility or the appropriate construction solution.
11. What humidity is reasonable indoors, and why there is no magic threshold
The EPA recommends keeping indoor relative humidity below 60% where possible, ideally around 30–50%. These are useful benchmarks for managing moisture, not clinical diagnostic limits or guarantees that mold cannot occur.
A hygrometer showing 48% in the living room cannot rule out a damp patch behind a wardrobe or a leaking pipe. Conversely, a temporary increase in humidity during a shower does not automatically prove a defect. Persistence, surface temperature and context matter.
In ASHRAE technical examples, materials with high surface humidity for prolonged periods present a higher risk of fungal growth. Therefore, do not track only an average reading; also check cold corners, floors and areas behind furniture.
12. Useful tools and their limits: hygrometer, thermometer, moisture meter and thermal imaging
| Tool | What it can show | What it cannot prove on its own |
|---|---|---|
| Hygrometer | Relative humidity and often air temperature | It does not measure water inside a wall |
| Surface thermometer | Whether a corner is colder than the air | It does not establish where the water comes from |
| Thermal-imaging camera | Temperature differences, possible thermal bridges and anomalies | It does not automatically identify mold or a leak; measurement conditions matter |
| Material moisture meter | Indications or measurements of moisture in certain materials, depending on the technology | Values are not universally comparable between concrete, plaster and wood |
| CO₂ monitor | An indirect indicator of air exchange in occupied spaces | It is not a detector of mold, spores or infiltration |
UK guidance from 2026 and Umweltbundesamt recommend selecting inspection methods according to the circumstances, rather than treating thermal imaging or a single measurement as a verdict. An incorrectly used thermal camera can indicate differences caused by radiation, reflections, heating or air currents, rather than necessarily a waterproofing defect.
For an efficient home, see also InfoBuz’s article on how an nZEB house is designed and why technical details matter.
13. Seven-day observation protocol: gathering clues without demolishing the wall
If there is no major active leak, extensive contamination or urgent medical issue, a short log can support an efficient discussion with the construction company or an expert. Do not postpone emergency repairs for seven days in order to complete the log.
- Day 1 – photograph and map. Record the location of the patch, its approximate area, the date, and whether water or odour is present. Take photographs without scraping or dispersing material.
- Day 2 – air measurements. Record the room’s temperature and humidity in the morning and evening, with the hygrometer in a representative location.
- Day 3 – cold surfaces. Without dismantling anything, check whether the affected area is visibly colder than neighbouring surfaces. Note the outdoor temperature.
- Day 4 – ventilation. Observe extractor-fan operation, the presence of an air intake and how long moisture persists after showering and cooking.
- Day 5 – weather. If it rains, observe whether the patch changes. If there is no rain that week, do not invent a relationship; continue observing.
- Day 6 – work history. Check the handover date, finishes, and documents relating to screeds, waterproofing and installations.
- Day 7 – summary. Record the hypotheses, photographs and questions the specialist needs to receive. Do not turn a personal conclusion into an expert assessment.
A log cannot see through concrete or confirm every infiltration. But it reduces the risk of a random intervention: repainting a patch caused by a defective connection rather than repairing the connection. For other seasonal checks, see the InfoBuz checklist for preparing a home for winter.
14. How to remove mold without concealing the problem beneath paint
The effective sequence is identify the moisture → stop the source → dry and assess the materials → remove contamination → reinstate finishes → check for recurrence. If you begin with the final step, the patch may return and you may lose time and money.
The EPA states that hard surfaces with limited contamination can, in some circumstances, be cleaned with detergent and water and then dried completely. Porous materials such as some plasterboard, carpets or insulation may need to be removed and replaced if contaminated in depth. Do not paint or apply filler directly over mold.
People cleaning affected areas should use appropriate respiratory protection, gloves and eye protection. The CDC recommends an N95 or higher-protection respirator for relevant cleaning operations. People with asthma, lung disease, significant allergies or weakened immune systems should not take part in cleaning.
As a practical US benchmark, the EPA says that in many cases small areas below approximately 10 ft² (0.93 m²) can be dealt with by a homeowner following safety instructions. But larger, recurrent or hidden contamination, contamination associated with dirty water, or situations involving vulnerable people justify specialist involvement. The threshold is not a universal legal limit in Romania, and even small areas may require assessment where hidden damage is present.
Never mix bleach with ammonia, acids or other cleaners. In EPA guidance, chlorine-based biocides are not recommended as a routine for every cleaning job, because the underlying issue is removal of contaminated material and moisture control. Do not use ozone generators or fogging as a substitute for remedying an infiltration.
15. Is a laboratory test needed for “black mold”?
Not routinely. Where mold is visible, the EPA says that in most cases sampling is not needed to decide that the problem requires remediation. There is no single universal airborne-spore threshold that determines whether every home is safe.
Black colour cannot identify a species and does not automatically prove exposure to a specific mycotoxin. In some cases, specialists may recommend sampling for complex investigations, to verify certain interventions or to distinguish between causes; the method and interpretation should be decided by competent professionals.
More importantly, find out why the material is damp. An online test that grows mold in a box cannot tell you on its own whether the main problem is condensation, a pipe or a leaking terrace. Where there is a persistent smell without visible patches, a professional assessment may identify hidden sources before materials are dismantled.
16. What health risks are documented, and who needs greater protection?
The WHO associates persistent dampness and indoor mold with a higher risk of respiratory symptoms, allergies and worsening asthma. Exposure may contribute to coughing, wheezing or irritation in some people, but not all respiratory symptoms in a home are automatically caused by mold.
The CDC warns that people with asthma, COPD, significant allergies and immunosuppression may face greater risks and should not personally clean contaminated areas. Contact a doctor if symptoms persist. Seek emergency medical help if severe breathing difficulty or other acute, life-threatening symptoms occur.
It is not accurate to claim that every mold patch “inevitably causes cancer” or that a particular air-test result guarantees the absence of risk. Risks depend on context, individual sensitivity and exposure; the shared recommendation of institutions is to prevent and remedy persistent moisture.
An air purifier with a HEPA filter can capture some airborne particles, but it does not dry a wall or repair an infiltration. Read InfoBuz’s comparison of what air purifiers can and cannot do.
17. A new home bought from a developer: which documents are worth keeping
For a new home, an owner may request documentation relevant to the work carried out: details on waterproofing, windows, installations, any tests and handover records, as applicable. Photographs taken before defects are covered, written communications and a timeline of the appearance of moisture can be useful when speaking with the contractor, developer or maintenance company.
Do not automatically state that every patch is a construction defect, and do not assume the resident alone is at fault. The causes may relate to execution, design, operation or a combination of them. Assessing responsibility and any warranty rights depends on the contract, documentation and legislation applicable to the specific circumstances.
A concise written message may include the address and affected room, date of observation, dated photographs, any measurements, times when the problem worsens, and a request for a technical inspection with a documented response. Do not dismantle important elements or modify installations before an assessment unless action is needed to stop water urgently or protect health.
For a broader inspection before purchase, see the InfoBuz guide to checks before buying a home. The recommendations in this section are informational and technical, not legal advice.
18. Mistakes that make mold return
- Repainting immediately with anti-mold washable paint. If the wall continues to become damp, the finish may temporarily conceal the symptoms.
- Assuming everything can be solved simply by airing out. Ventilation helps with moisture in the air, but it does not repair a defective terrace or pipe.
- Assuming thicker insulation is always the solution. Without analysing the details, an incorrect intervention can move the vulnerable point elsewhere.
- Relying on a single hygrometer reading. A corner surface may have much higher humidity than air measured in the middle of the room.
- Treating thermal imaging as final proof. It shows thermal anomalies that must be correlated with other measurements and inspections.
- Buying a dehumidifier first and looking for the cause later. The device can help control humidity temporarily, but it does not repair building defects.
- Ignoring contaminated porous materials. Visibly cleaning a surface does not automatically mean the interior of the material is sound.
The right question is not “Which spray kills mold fastest?” but “What is the path of the water, and how do I stop it?” The same reasoning is useful in InfoBuz’s guide to cleaning mold in homes, but for new buildings the construction history is also essential.
19. What to do first: an order of spending that may avoid unnecessary costs
Prioritise safety, stopping active infiltrations and protecting health. If water is coming from plumbing or the roof, the issue should be resolved quickly. If the affected area is extensive or concealed, consider a specialist in assessment and remediation. If condensation is the leading suspicion, check ventilation, temperature, humidity and thermal bridges.
Only after the cause has been clarified and the substrate is dry does it make sense to budget for reinstating finishes. Temporary dehumidification, cleaning or moving furniture may help in some circumstances, but they do not replace repair of a defective technical detail.
For new homes, a well-documented inspection before handover or in the period afterwards can reduce repeat work. For other building components, InfoBuz also explains why an energy-efficient design depends on the whole building envelope, not a single insulation material.
Frequently asked questions about mold in a new home
Why does mold appear in a new home even with thick insulation?
Because insulation does not automatically eliminate construction moisture, infiltrations, inadequate ventilation or thermal bridges in construction details. The cause must be identified on site.
Can mold appear without water droplets on the wall?
Yes. A surface can remain damp enough for long enough to encourage mold before it reaches the dew point and visible liquid condensation appears.
What humidity should I have in a new home?
The EPA recommends, where possible, indoor relative humidity below 60%, ideally 30–50%. This is not an absolute threshold that rules out mold in corners, where temperatures are lower.
If mold appears only in winter, is it definitely condensation?
Condensation and thermal bridges are plausible explanations, but they are not the only ones. Some infiltrations or defects can also follow a seasonal pattern.
Is the developer at fault if mold appears after moving in?
That cannot be determined from a photograph alone. The technical cause must be investigated and correlated with documentation, the contract and the home’s actual conditions.
Is a dehumidifier useful against mold?
It can help reduce air humidity in certain conditions and support controlled drying, but it does not repair water infiltration or a thermal bridge. Do not treat it as the sole solution.
Can thermal imaging prove that I have an infiltration?
Not by itself. It can reveal temperature anomalies that must be interpreted alongside inspections and other measurements.
Is a test needed for “black mold”?
In most cases involving visible mold, the EPA does not recommend routine testing before remediation. Colour does not reliably identify the species or the level of risk to an individual.
Can I clean a small area of mold myself?
Sometimes, on hard surfaces and with appropriate protection. But the scale of the problem, contaminated materials and the health of people in the home matter. Extensive, concealed or recurring areas justify professional assessment.
Does keeping a window permanently tilted open help?
It can sometimes increase air exchange, but it is not a universal solution: safety, climate, heat loss and the home’s ventilation system matter. Planned airing or well-designed mechanical ventilation may be more suitable.
What should I photograph if I ask the builder to intervene?
The exact location, approximate area, date, relationship to rain or cold, and any water marks. Keep communications and request an assessment of the cause before finishes are reinstated.
Is a HEPA purifier enough?
No. It may capture airborne particles, but it does not dry a wall or repair leaks. Moisture control remains essential.
Technical and public-health sources consulted
- WHO Europe – Guidelines for Indoor Air Quality: Dampness and Mould (2009).
- WHO / NCBI Bookshelf – summary of evidence on dampness and mold.
- US EPA – A Brief Guide to Mold, Moisture and Your Home: moisture control, cleaning and prevention.
- US EPA – when mold sampling is and is not necessary.
- CDC – Mold Clean Up Guidelines and Recommendations: risks and protective equipment.
- Germany’s Umweltbundesamt – guidance on preventing, identifying and remediating mold (updated 2024 edition).
- ASHRAE Handbook – Moisture and Mold: local surface humidity and prevention of material deterioration.
- UK Government, 1 April 2026 – guidance on identifying the causes of damp and mold (legally applicable in England; used here solely as a technical reference).
- Centre for Sustainable Energy – condensation, damp and mold.
Illustrative photograph provisionally used on the site: Hydra 4x / Unsplash, under the Unsplash License. It is a reference image and does not demonstrate the technical cause in any particular home.
Conclusion: in a new home, mold is a signal to investigate, not a wall-colour problem
Mold in a new home does not automatically mean the insulation is useless, the resident has not aired the property sufficiently, or the developer got every detail wrong. It means a particular surface has remained damp for long enough, and the source of the water must be established: the air, building materials, a thermal bridge, an installation or an infiltration.
For more information on window condensation, see The optimal indoor temperature in winter: 18, 20 or 22°C?, which provides complementary detail on this subject.
A modern home should be understood as a system: building envelope, airtightness, thermal insulation, ventilation, heating, drainage and finishes. First check the moisture, stop the source, dry and remediate safely, then reinstate the finish. That is the difference between temporarily concealing a patch and genuinely resolving the problem.






Discuția cititorilor
Ai o opinie sau o întrebare despre acest articol? Spune-ne ce crezi.
Fii primul care deschide discuția.
Te rugăm să păstrezi un limbaj civilizat și să discuți la subiect. Comentariile spam sunt filtrate automat.