
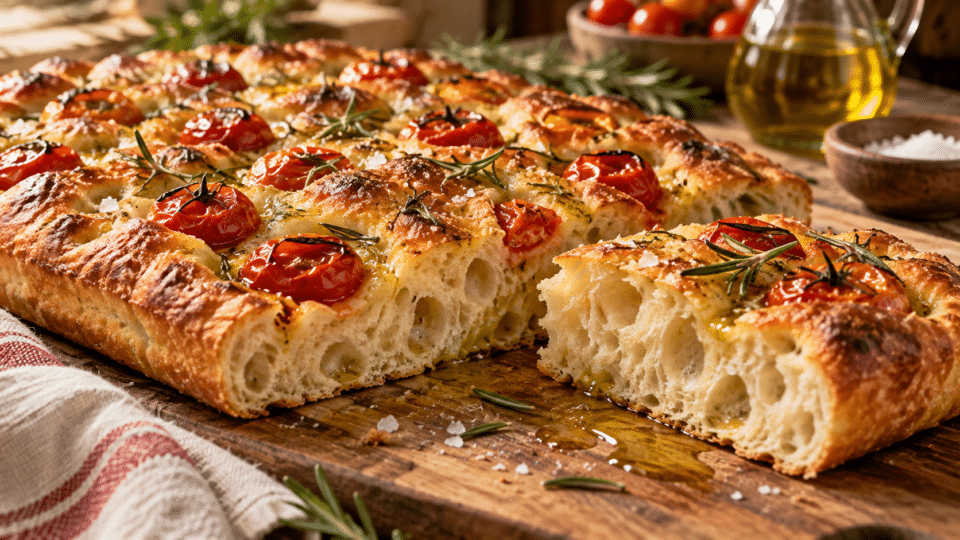
The secret to focaccia with an airy crumb is not aggressive kneading, but the combination of water, time, folds and carefully controlled baking. The version below uses 500 g of flour and 400 g of water — 80% hydration — followed by a slow fermentation in the refrigerator. This is an editorial recipe explained step by step, with easily checked weights and checkpoints; it is not a promise that the result will look identical in every oven.
For related information, see Baked apples with oats and walnuts, without pastry: how to use soft fruit without losing a crisp crust, an article that explores an aspect directly connected to this subject.
Cold-fermented focaccia is well suited to a home-baking experiment: it does not need to be shaped like a loaf, while the baking tray and olive oil help create a flavoursome crust. Total time may be around 36–48 hours, most of it resting in the refrigerator.
Cold-fermented focaccia: recipe specification
| Parameter | Recommended value |
|---|---|
| Yield | One tray of focaccia, around 8–10 portions |
| Tray | Approximately 25 × 35 cm, metal |
| Flour | 500 g, preferably bread flour, around 11–13% protein |
| Water | 400 g, at room temperature |
| Hydration | 80% (400 ÷ 500 × 100) |
| Instant dry yeast | 1 g |
| Fine salt | 11 g |
| Olive oil in the dough | 20 g |
| Additional oil for the tray and surface | 30–40 g, as needed |
| Cold fermentation | Approximately 36–48 hours, in the refrigerator |
| Baking | Approximately 220–230°C, depending on the oven and tray |
The ingredients form a working formula. Flours absorb water differently, and yeast activity depends on temperature. If the dough seems unusually runny and holds no structure at all after resting, start with 380 g of water and add the remainder gradually on the next attempt. Do not turn a high-hydration recipe into one with a great deal of extra flour simply because it is sticky.
Preparing the ingredients
- 500 g white bread flour;
- 400 g water;
- 1 g instant dry yeast, weighed accurately;
- 11 g salt;
- 20 g olive oil for the dough;
- 30–40 g olive oil for the tray and the top;
- rosemary and coarse salt for the surface, in moderate quantities.
A scale with good resolution is useful for measuring 1 g of yeast. An amount estimated by eye can substantially alter a 48-hour fermentation. Use a lidded container large enough to allow the dough to rise.
Day 1: hydration, mixing and folds
- Mix the water and yeast in a bowl. Add the flour and combine until no dry patches remain.
- Cover and leave for around 20–30 minutes to hydrate the flour.
- Add the salt and 20 g of oil. Incorporate them with gentle folds and squeezes, without adding excessive flour.
- Over the next hour, carry out three or four sets of folds at 15–20-minute intervals. Lightly wet your hands to handle the dough.
- Watch for the dough to become more cohesive and elastic. It does not need to be firm or as easy to shape as a traditional bread dough.
- Transfer the dough to the lightly oiled container, close the lid and refrigerate for slow fermentation.
At first, the dough may seem very soft. It should gradually gain structure after the folds. If it tears immediately when stretched, let it relax and handle it gently. Building structure takes time.
Day 2: the refrigerator does most of the work
Keep the container cold in a refrigerator that is working properly. There is no need to keep opening the lid. The dough may rise visibly and form bubbles; its pace depends on the yeast, flour and actual temperature. If the refrigerator is too warm or you have added too much yeast, fermentation may speed up beyond what was planned.
Over-fermented dough can lose tension and become very fragile. If you notice a rise followed by a pronounced collapse, use slightly less yeast or shorten the time next time. There is no universal clock: the dough’s signals are more useful than one fixed time.
Day 3: tray, final proof and baking
- Generously oil the tray with some of the reserved oil.
- Transfer the cold dough carefully, without kneading it again. If it does not reach the corners, let it relax for 20 minutes, then gently stretch it.
- Cover and leave at room temperature until visibly aerated; the timing may vary substantially with the temperature.
- Preheat the oven thoroughly to around 220–230°C, taking account of its individual characteristics.
- Drizzle with oil, then press with your fingertips to create the characteristic dimples. Sprinkle with rosemary and coarse salt.
- Bake for around 20–30 minutes, or until the surface is evenly browned and the base is well baked. Adjust for the tray, thickness and oven.
- After a few minutes, remove the focaccia from the tray and place it on a wire rack to prevent the base from softening.
Sample timetable for a 48-hour schedule
| Time | Activity |
|---|---|
| Monday, 6:00 pm | Mix the ingredients and begin the first rest |
| Monday, 6:30–7:45 pm | Incorporate the salt and oil; carry out the folds |
| Monday, 8:00 pm | Dough goes into the refrigerator |
| Tuesday | Cold fermentation, with no required intervention |
| Wednesday, around midday | Transfer to the oiled tray and begin the final proof |
| Wednesday afternoon | Make dimples, add toppings and bake |
This timetable is indicative and may need adjustment. In particular, do not strictly set the final-proof duration to the same hour if the dough is still cold, dense or insufficiently risen.
Five common mistakes and how to correct them
| Problem | Possible cause | What to change next time |
|---|---|---|
| Dense crumb | Insufficient proofing | Wait for signs of aeration before baking |
| Dough that tears | Insufficient structure or rough handling | Allow longer rests and use gentle folds |
| Focaccia that is too sour or fragile | Over-fermentation | Use less yeast or shorten the time |
| Soft base | Underbaking or cooling in the tray | Use a metal tray, check the base and use a wire rack |
| Surface too dark | Temperature too high or unsuitable rack position | Adjust the rack position and baking time |
Why the long-fermentation method works
Fermentation allows yeast to produce gases that help aerate the dough. Folding develops structure without lengthy kneading, while oil helps create the crust texture when it meets the hot tray. King Arthur Baking’s focaccia guides explain the advantages of pre-fermentation for flavour and structure.
It would not be accurate to say that every slowly fermented bread is automatically healthier for everyone. Benefits, tolerance and preferences differ, and people with conditions such as coeliac disease should follow specific medical advice.
Serving and storing
It is excellent on the day it is baked, on its own or as the base for a sandwich. Let it cool sufficiently before slicing. Leftovers should be kept under appropriate hygienic conditions and can be reheated to restore some of the crust’s texture. For longer storage, freezing slices is an option.
You can vary the toppings with olives, onions, tomatoes or herbs, but do not overload the surface with wet ingredients: they can delay the centre from baking. A first attempt is more useful with rosemary and salt, to understand how the dough behaves.
Premium focaccia is the result of control, not haste. When you record quantities, temperature and time, each attempt becomes more predictable. In the kitchen, repeatability matters more than a perfect photograph.
Read also on InfoBuz
For a comparison of kneading and proofing methods: InfoBuz’s guide to homemade bread.
Frequently asked questions
Can I use all-purpose flour?
You can try, but flour with a lower protein content may have more difficulty supporting dough at 80% hydration. For a first attempt, you can reduce the water to around 380 g and note the resulting texture.
What if the dough does not rise enough?
Check the yeast’s freshness, storage conditions and temperature. A very cold refrigerator can slow fermentation considerably. Do not always compensate with more yeast; watch for signs of aeration and adjust the time.
Can I make the recipe in one day?
Quick-proof focaccia recipes exist, but this formula is designed for flavour and cold fermentation. A one-day adaptation requires changes to the yeast quantity and stages, effectively making it a different recipe.
How do I avoid a soggy base after baking?
Use a suitable tray, preheat the oven fully and check that the base has browned. Removing the focaccia from the tray onto a wire rack after baking allows steam to escape. Actual baking time varies with the thickness and tray material.


Discuția cititorilor
Ai o opinie sau o întrebare despre acest articol? Spune-ne ce crezi.
Fii primul care deschide discuția.
Te rugăm să păstrezi un limbaj civilizat și să discuți la subiect. Comentariile spam sunt filtrate automat.